How To: Upgrade the RAM and SSD in a Lenovo Legion Y520 Laptop
I recently upgraded the RAM and SSD in my Lenovo Legion Y520 laptop and made a video detailing the process.
There are a few parts you will need to be able to complete this upgrade:
- A set of precision screwdrivers for removing the screws from the back of the laptop
- The RAM you want to install
- The SSD you want to install
- An M.2-to-USB external adapter for the SSD
Once you have the required parts the process for upgrading the RAM and SSD in a Lenovo Legion Y520 Gaming Laptop can be logically divided into three main sections:
- Get both SSDs connected to the computer at the same time so you can clone over your files
- Use the Macrium Reflect 7 free software to actually clone your files to the new SSD
- Physically install the RAM and SSD into the laptop
So, the laptop came with a 256GB SSD already installed in it out-of-the-box and for a few months I was brushing up against the storage limit often enough that I considered upgrading the SSD a top priority for productivity’s sake. After much research on the current SSDs on the market I bit the bullet and purchased a Samsung Evo 970 PRO 1TB SSD, which seems to be widely considered the fastest M.2 NVME SSD currently on the market. And, I figured, since I was already going to be opening up the laptop to do the SSD upgrade, I’d also purchase some more RAM and upgrade from the factory-installed 16GB to 32GB, which would turn the computer into a certified work-horse of a machine.
RAM
The Y520 has two RAM slots inside of it so to upgrade the device you want to be looking for a set of two RAM chips. 32GB is the max amount of RAM supported by the computer, as long as you stay under that limit any DDR4 1.2v 260-pin SO-DIMM RAM chips should be compatible.
This is what a DDR4 260-pin SO-DIMM RAM chip looks like:
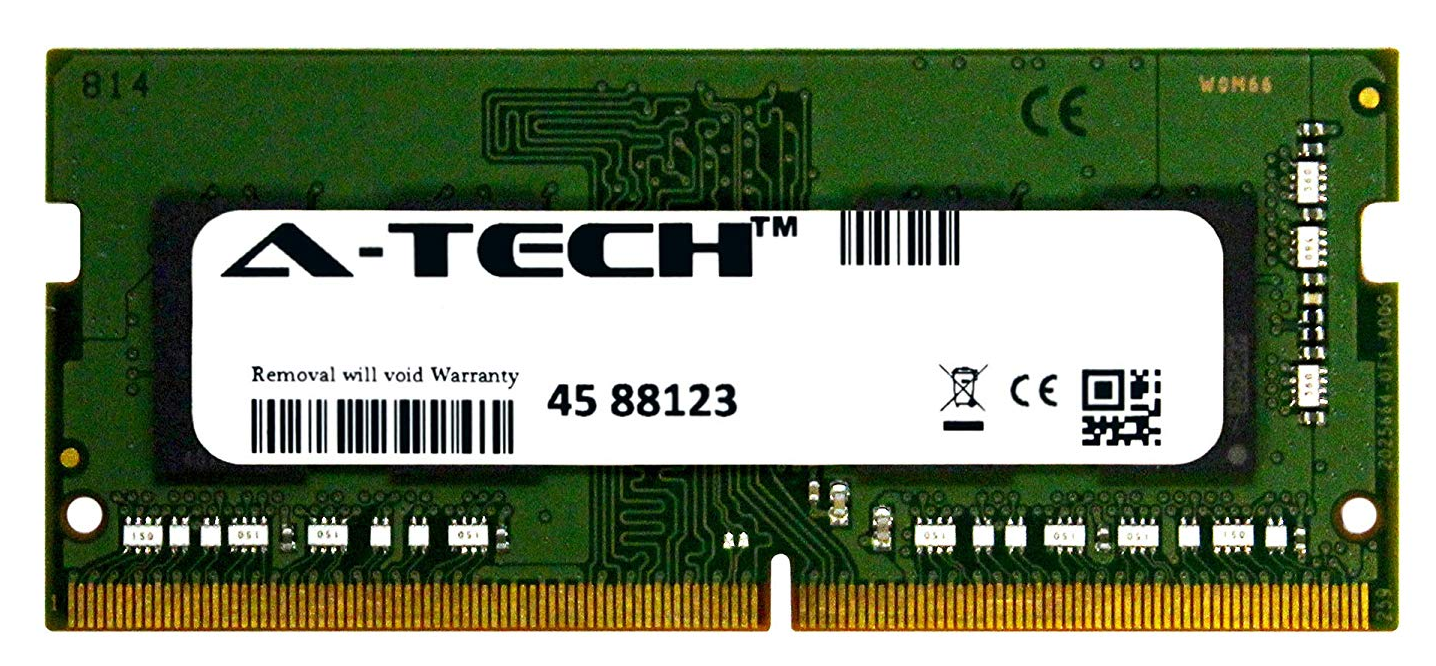
I purchased a set of A-Tech brand RAM chips like the ones above for my installation. Was upgrading to 32GB of RAM overkill? Yah, most likely. But I do appreciate never having to worry about available memory while having multiple Visual Studio instances open or some 200 odd chrome tabs as I plunge into trying to solve whatever esoteric issue I am currently combating.
SSD
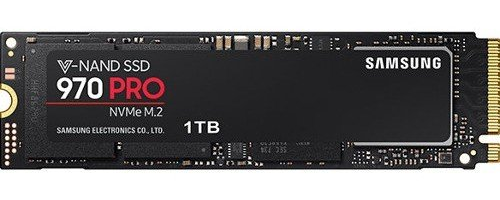
The Y520 has only one M.2 PCIe SSD slot inside of it and any M.2 NVMe SSD should be compatible with it. M.2 is a hardware standard for internally mounted expansion cards that simply means the SSD was designed to fit into a laptop rather than a desktop computer. NVMe, or Non-Volatile Memory Express, is a standard for computer storage drives that connect to the CPU through a PCIe attachment that has to do with the type of transfer connection the drive uses. NVMe developed out of and superseded standard SATA drive connections. NVMe drives are roughly seven times faster than SATA drives.
This is what an M.2 NVMe SSD looks like:
M.2-to-USB Adapter
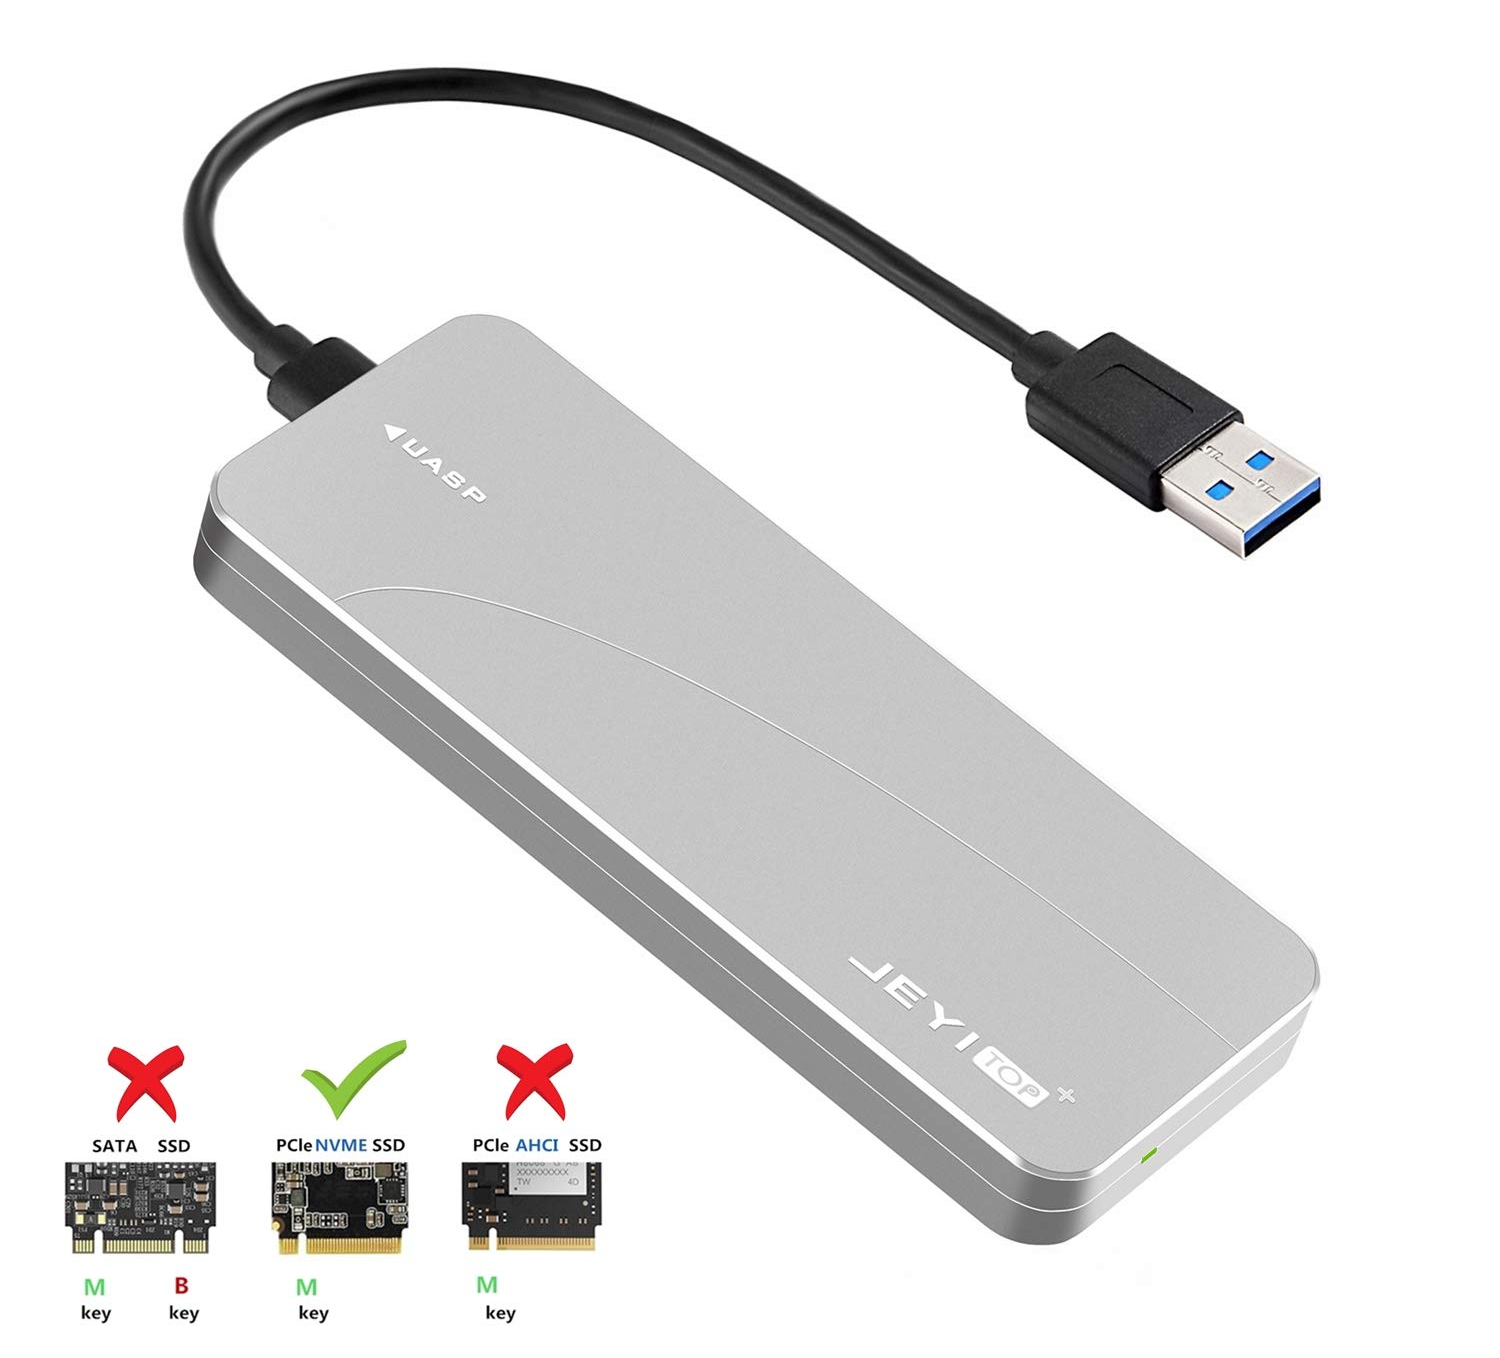
The main difficulty of this upgrade was the fact that the laptop has only one M.2 PCIe SSD slot inside of it and I now had two SSDs that both needed to be attached to the computer simultaneously so that I could transfer the contents from one to the other. After some research I found an M.2 NVMe external USB adapter which would solve the issue for me: by attaching the new SSD to the laptop via USB connection, both SSDs would be recognized by the machine at the same time.
This is what the M.2-to-USB adapter I used looks like:
Once I ordered the adapter and had that issue figured out I used a free program called Macrium Reflect 7 to copy the files from the old SSD to the new one. This process is a little tricky as I explain in the video because you have to properly open up the partition on the new SSD with just a small amount of space left open and unused. You obviously want to maximize the usable amount of space on your new SSD, so finding that sweet spot where the space of the main C:\ partition is maximized while also allowing enough extra space for the other drives to be copied just takes a little trial-and-error to get right. Once you have properly copied over your files to the new SSD you have completed the most difficult part. All that’s left is just the physical installation.
Physical Installation
To begin the installation you need to remove all of the screws from the back of the laptop and pry it open. Removing the screws will require a set of precision screwdrivers and to pry the back off you just need any sort of hard, plastic device like an old credit card or guitar pick. Prying the back off of it can be a little tricky to do and I kind’ve scraped up my hand when I did it so just go slow, use leverage from the plastic device, and don’t hurt yourself.
Here are the locations of the screws to remove:

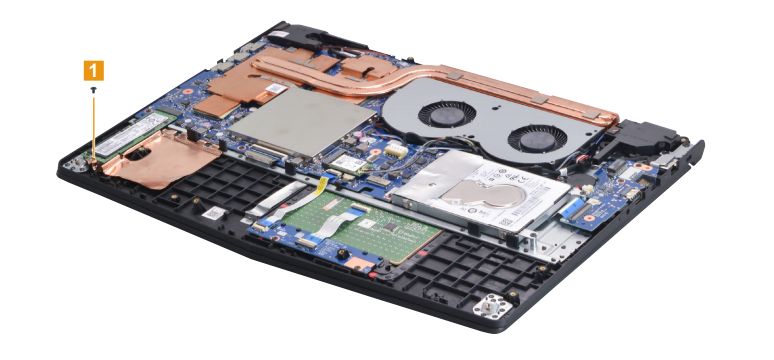
Once you have the back off you will want to locate the SSD inside, unscrew the one mounting screw holding it in place, carefully wiggle the old SSD side-to-side to remove it, carefully wiggle the new SSD into place, and finally reinstall the screw to hold it in place.
Location of the screw holding the SSD in place:
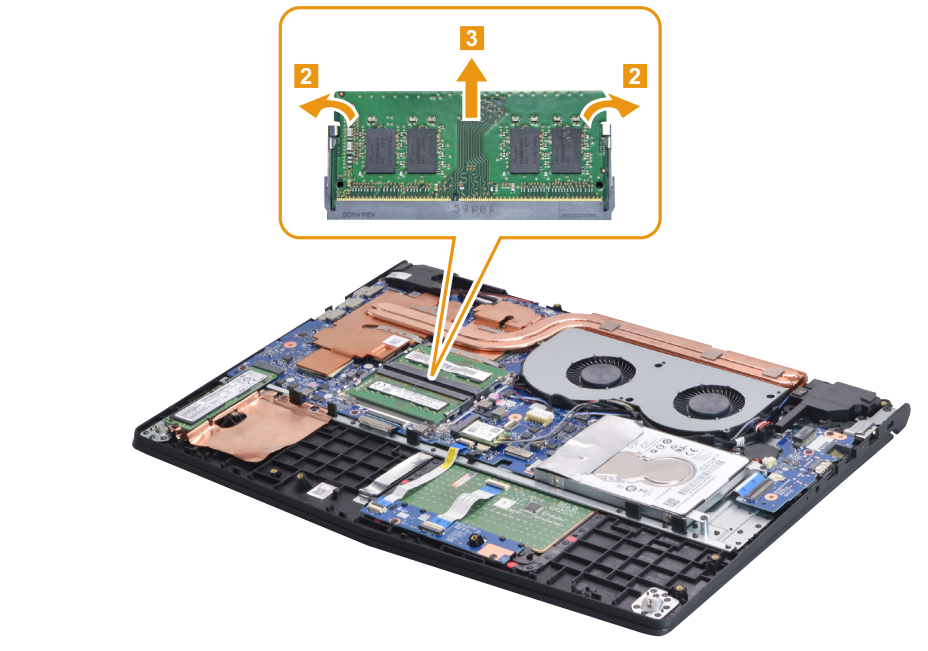
Installing the RAM is a much easier process. You simply pull off the square-shaped silver shield to reveal the RAM slots and then carefully pry the arms holding the RAM in place outwards to release the chips. Carefully pull the old chips out and slide the new ones in.
Location of RAM and how to remove:
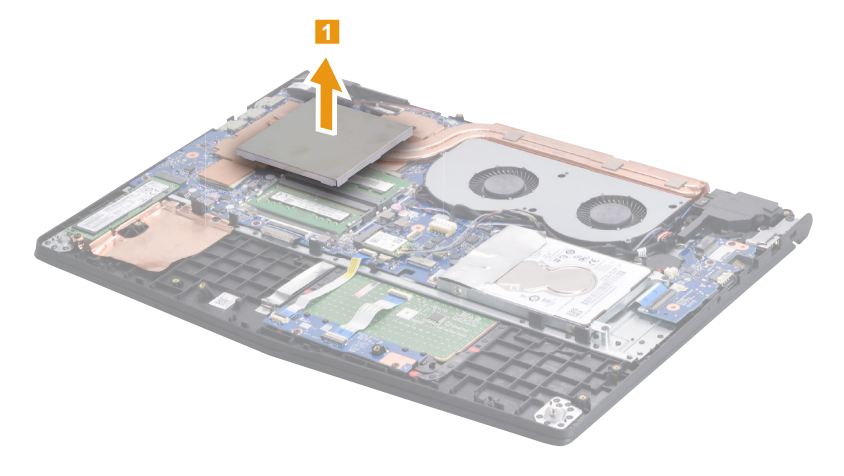
Then just put the silver protective plate back on by wedging it into place, re-attach the back of the laptop, reinstall all the screws, and you are done!
All in all I am incredibly happy with both upgrades. I am writing this blog post about a month and a half after the fact so I have had some time to use the new SSD and RAM and I have no complaints. The increased SSD capacity is incredibly useful for editing videos and having enough space for all the software development environments and runtimes is also very useful and a great quality of life upgrade. I highly recommend it to anyone considering this upgrade. Hope you found this guide helpful!
I also wrote a guide on iFixit that goes through the whole process a little bit more technically in-depth and I also uploaded a video of the whole physical installation for anyone interested in watching just that part of the process.